
What's Inside the GPUWorks Installation Package?
Before installing, let's first understand what's in the GPUWorks installation package (40+ MB).
The GPUWorks installation package — only 40+ MB in total — consists of two parts: the control-plane Server and the node Agent.
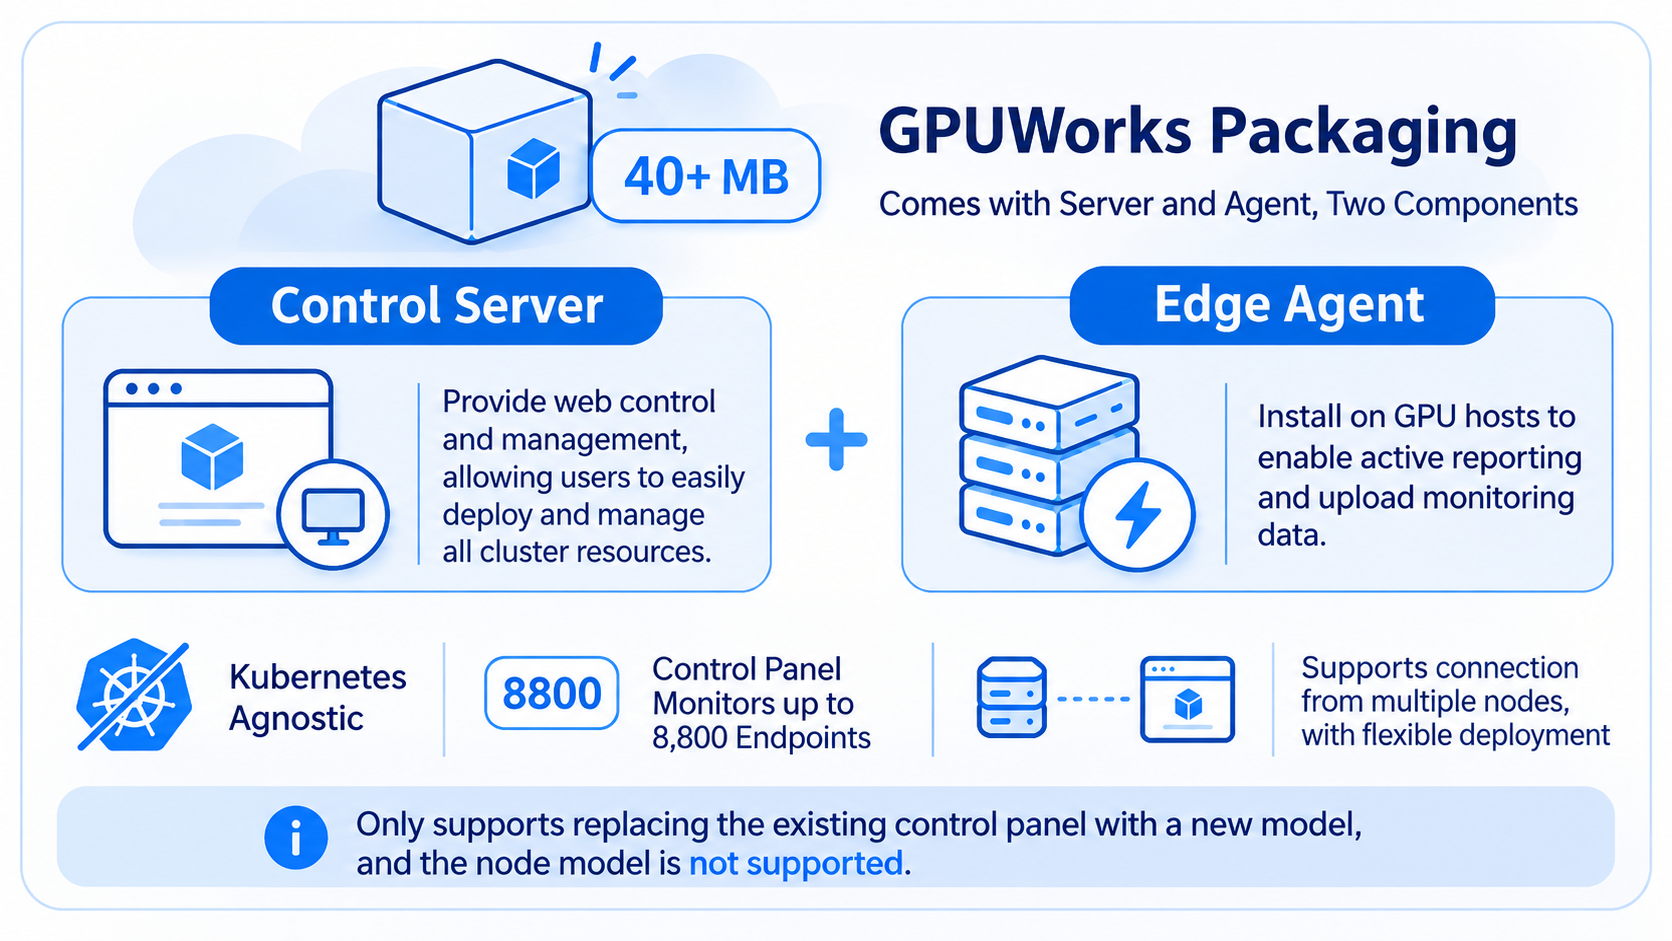
Control-plane Server: provides the web console and the model service gateway, responsible for node onboarding, model management, and deployment management.
Node Agent: installed on GPU hosts, actively connects to the control plane and reports compute capacity.
GPUWorks's console and API listen on port 8800 by default. The node Agent initiates connections from the node side, so the node only needs to be able to reach the control plane — no inbound ports need to be opened on the node. This design also determines the blast radius of upgrades: an upgrade replaces only the control plane, while inference containers and models already running on the nodes are unaffected.
The focus of an initial GPUWorks deployment is to get the control plane running and confirm that nodes can reach it. This article is organized into three sections — installation, verification, and upgrade — and the commands and default values follow the release-26.11 documentation [1].
01 / Prerequisites
The prerequisites for installing GPUWorks are modest — common Linux and Apple devices are fine.
The project requires the following operating systems and architectures:
linux-amd64Apple-silicon Mac uses the macOS 15+ installation package
Disk:
The filesystem containing the installation directory needs at least 2 GiB free space
Port:
Port 8800 must not be occupied by another process by default
Permissions:
Registering a systemd / launchd service requires
rootorsudoWithout
sudo, you can install to a user directory
Note: when the host cannot access the internet, first download the release package on a machine that can, then copy it over; the node must be able to reach the control plane's listening address.
02 / Installation
GPUWorks offers three installation methods for rapid deployment: AI-assisted installation, one-click installation, and manual installation.
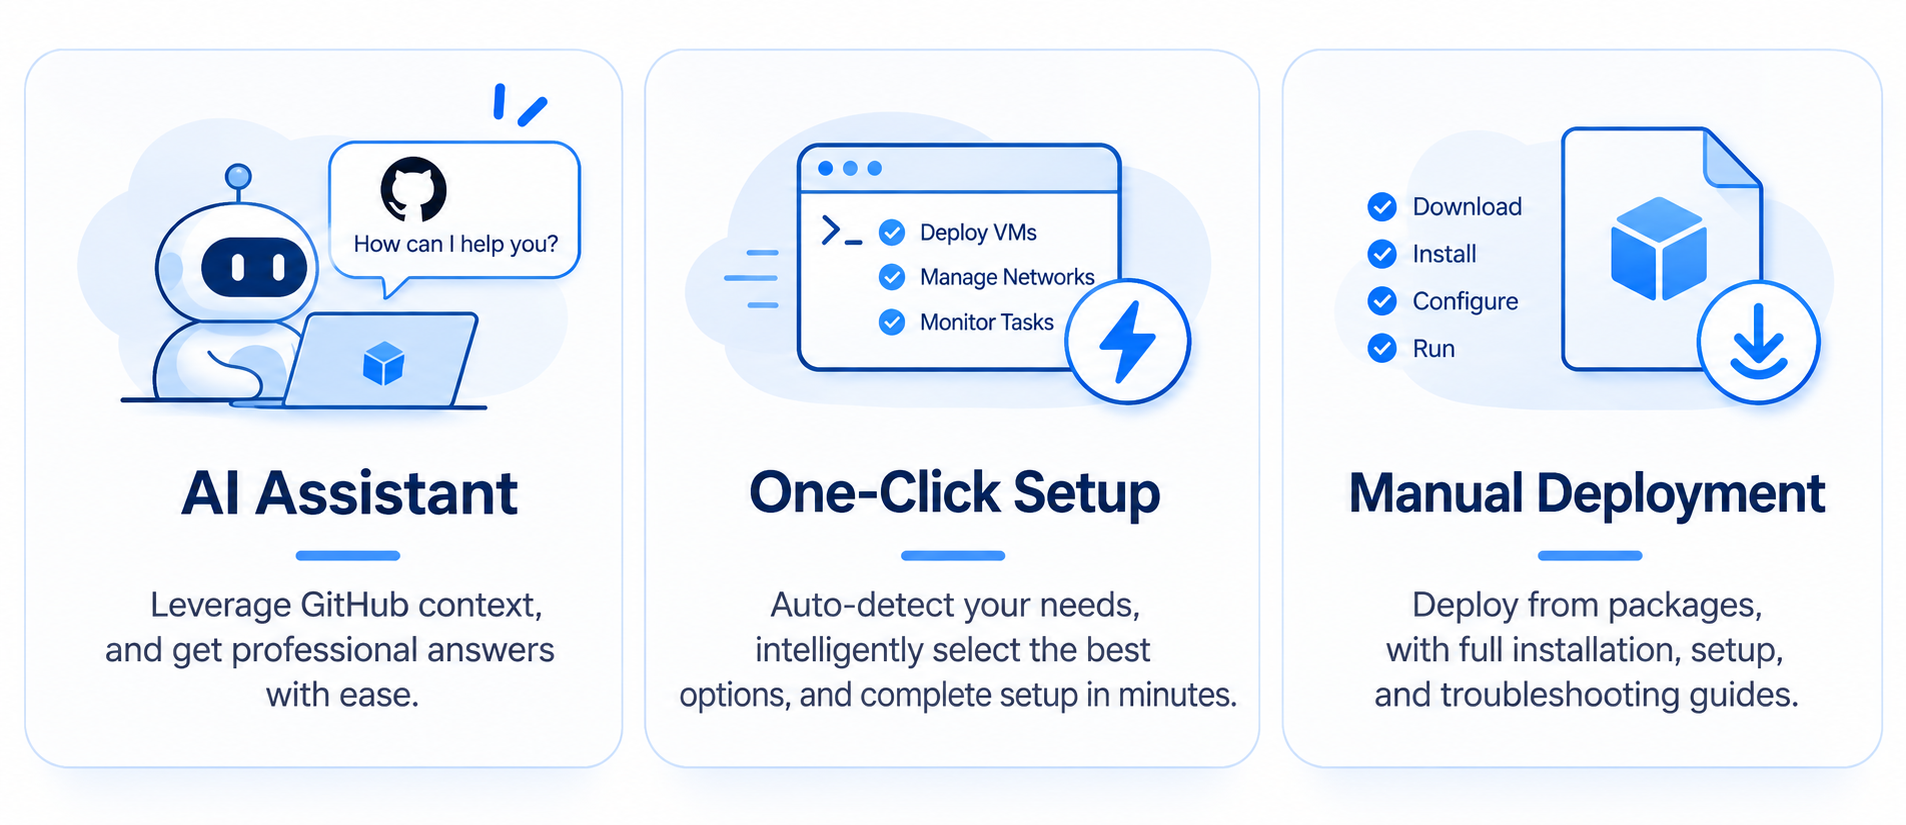
2.1 Install with an AI Assistant
In GPUWorks's GitHub README there is a prompt specifically prepared for AI programming assistants (WorkBuddy, CodeX, etc.) to recognize and install:
Install the GPUWorks control plane on this host and verify it.
Run
bash <(curl -fsSL https://dl.gpuworks.ai/get.sh) --quiet: it downloads the latest build, verifies it, and installs it as a service listening on port 8800 (using sudo when needed). If I don't have sudo or don't have systemd, append--dir ~/gpuworks-server --no-systemdto the command.Verify with
curl -fsS http://<listen-address>/healthz(it should contain"status":"ok"), and give me an installation summary: the access address, installation directory, data directory, and where the initial admin password is stored.Do not open firewall ports, do not modify other services, and do not onboard GPU nodes. Tell me which address GPU nodes should use to reach the server; I'll add the nodes myself in the web UI.
Simply drop the prompt — or the GitHub URL ( GitHub - flitai-io/gpuworks: A ~45 MB MaaS platform: one cluster across public and private clouds, on any mix of accelerators.) — into an AI programming assistant to complete the installation.
2.2 One-Click / Script Installation
Run the following on the target host (Linux or Apple-silicon Mac):
The script picks the fastest release source (usually Alibaba Cloud OSS or Huawei Cloud OBS in mainland China), downloads the release package for the local platform, verifies it against SHA256SUMS, and then runs ./gpuworks install. The subsequent interaction is identical to manual installation.
Script arguments are passed through unchanged to the installer — for example, silent installation:
To use the rolling preview, specify the channel with GPUWORKS_CHANNEL=nightly; to specify a release source, use GPUWORKS_SOURCE=<source-address>. When no release version is available yet, the script automatically falls back to nightly.
2.3 Manual Installation
Use manual installation when you need to verify items one by one, or when the host can only receive the release package offline (example below uses Alibaba Cloud OSS in mainland China):
Once the verification shows OK, extract and run the installer in the same terminal:
Other available sources: Huawei Cloud OBS https://gpuworks-dl.obs.cn-east-3.myhuaweicloud.com, and overseas https://dl.gpuworks.ai — all three sources provide the same release package. Replace release with nightly in the commands to install the rolling preview.
2.4 Prompts for Installation Info During Installation
An existing installation keeps its current values.
When an admin account already exists, the password is no longer prompted.
Parameters already specified on the command line are not re-prompted.
With
--quiet, all unspecified items use their default values.
Installation summary — the summary includes the access address, admin password, installation directory, and data directory. The default installation directory is /opt/gpuworks/server; custom directories take precedence from the summary. These details are needed later for verification, password changes, and upgrades.
03 / First Login
After installation, complete these four steps to confirm the control plane is actually usable.
3.1 Check Health
Run this on the control-plane host, replacing <listen-address> with the IP and port from the summary:
A status of ok and a version matching the currently running version mean the service is healthy. If it fails, check the logs and port first.
3.2 Log In to the Console
Open the access address from the summary in a browser and log in with admin and the password from the summary to confirm you can enter the console.
3.3 Change the Initial Password
Run this in the actual installation directory. For a systemd installation, first run newgrp gpuworks as instructed in the summary — or re-login — to obtain the group permission:
Changing the initial password via the Web UI will be provided in a later version. This command reads the data directory from server.yaml in the same directory as the binary; you can also specify it explicitly with --data. Do not leave the real password in your command history or logs.
3.4 Log In Again and Delete the Plaintext Credentials
After confirming the new password works, delete initial-credentials in the actual data directory. This file holds the initial credentials; deleting it does not change the account password.
Note: the above commands must use the binary inside the installation directory. The installer does not add it to PATH.
At this point the control plane is usable. The next step is to generate an install command in the console, onboard nodes, and then deploy your first model. See the Operations Guide [2].
04 / Upgrade Notes
The service is briefly interrupted during an upgrade.
The console and
/v1gateway are unavailable; inference containers and models on the nodes are unaffected.There is a backup, and rollback has a cost. Before an upgrade, a backup is taken automatically; on failure it rolls back to the pre-upgrade snapshot automatically. New data generated during the upgrade may be lost with the rollback.
Only the control plane is upgraded. The Agents on existing nodes are not upgraded automatically. New Agents are embedded in the Server already; you can click "Upgrade Agent" on the nodes page without accessing the release source.
Note: running ./gpuworks install repeatedly is not an upgrade. It is used to repair the service or switch between systemd/nohup — it replaces the binary and restarts, but there is no upgrade backup or rollback.
05 / Upgrade Methods
GPUWorks offers three upgrade methods; choose the one that fits your scenario.
5.1 Console Upgrade
The prerequisite is that the control plane is managed by systemd, launchd, or serve --supervise, runs the binary from the installation directory, and the service account can write to that directory. When this isn't met, the page explains the reason and provides the commands to fix it.
1.As an administrator, go to Settings → General → Version & Updates and check the server's current version.
2.Select an update channel (stable release or rolling preview nightly), click Check for updates, and review the latest version.
3.Click Upgrade on the server row, and in the confirmation dialog verify the target version and the interruption notice, then confirm.
4.Wait for the page to recover. The upgrade is complete only when "The server has been upgraded to the target version" appears and the current version matches the target.
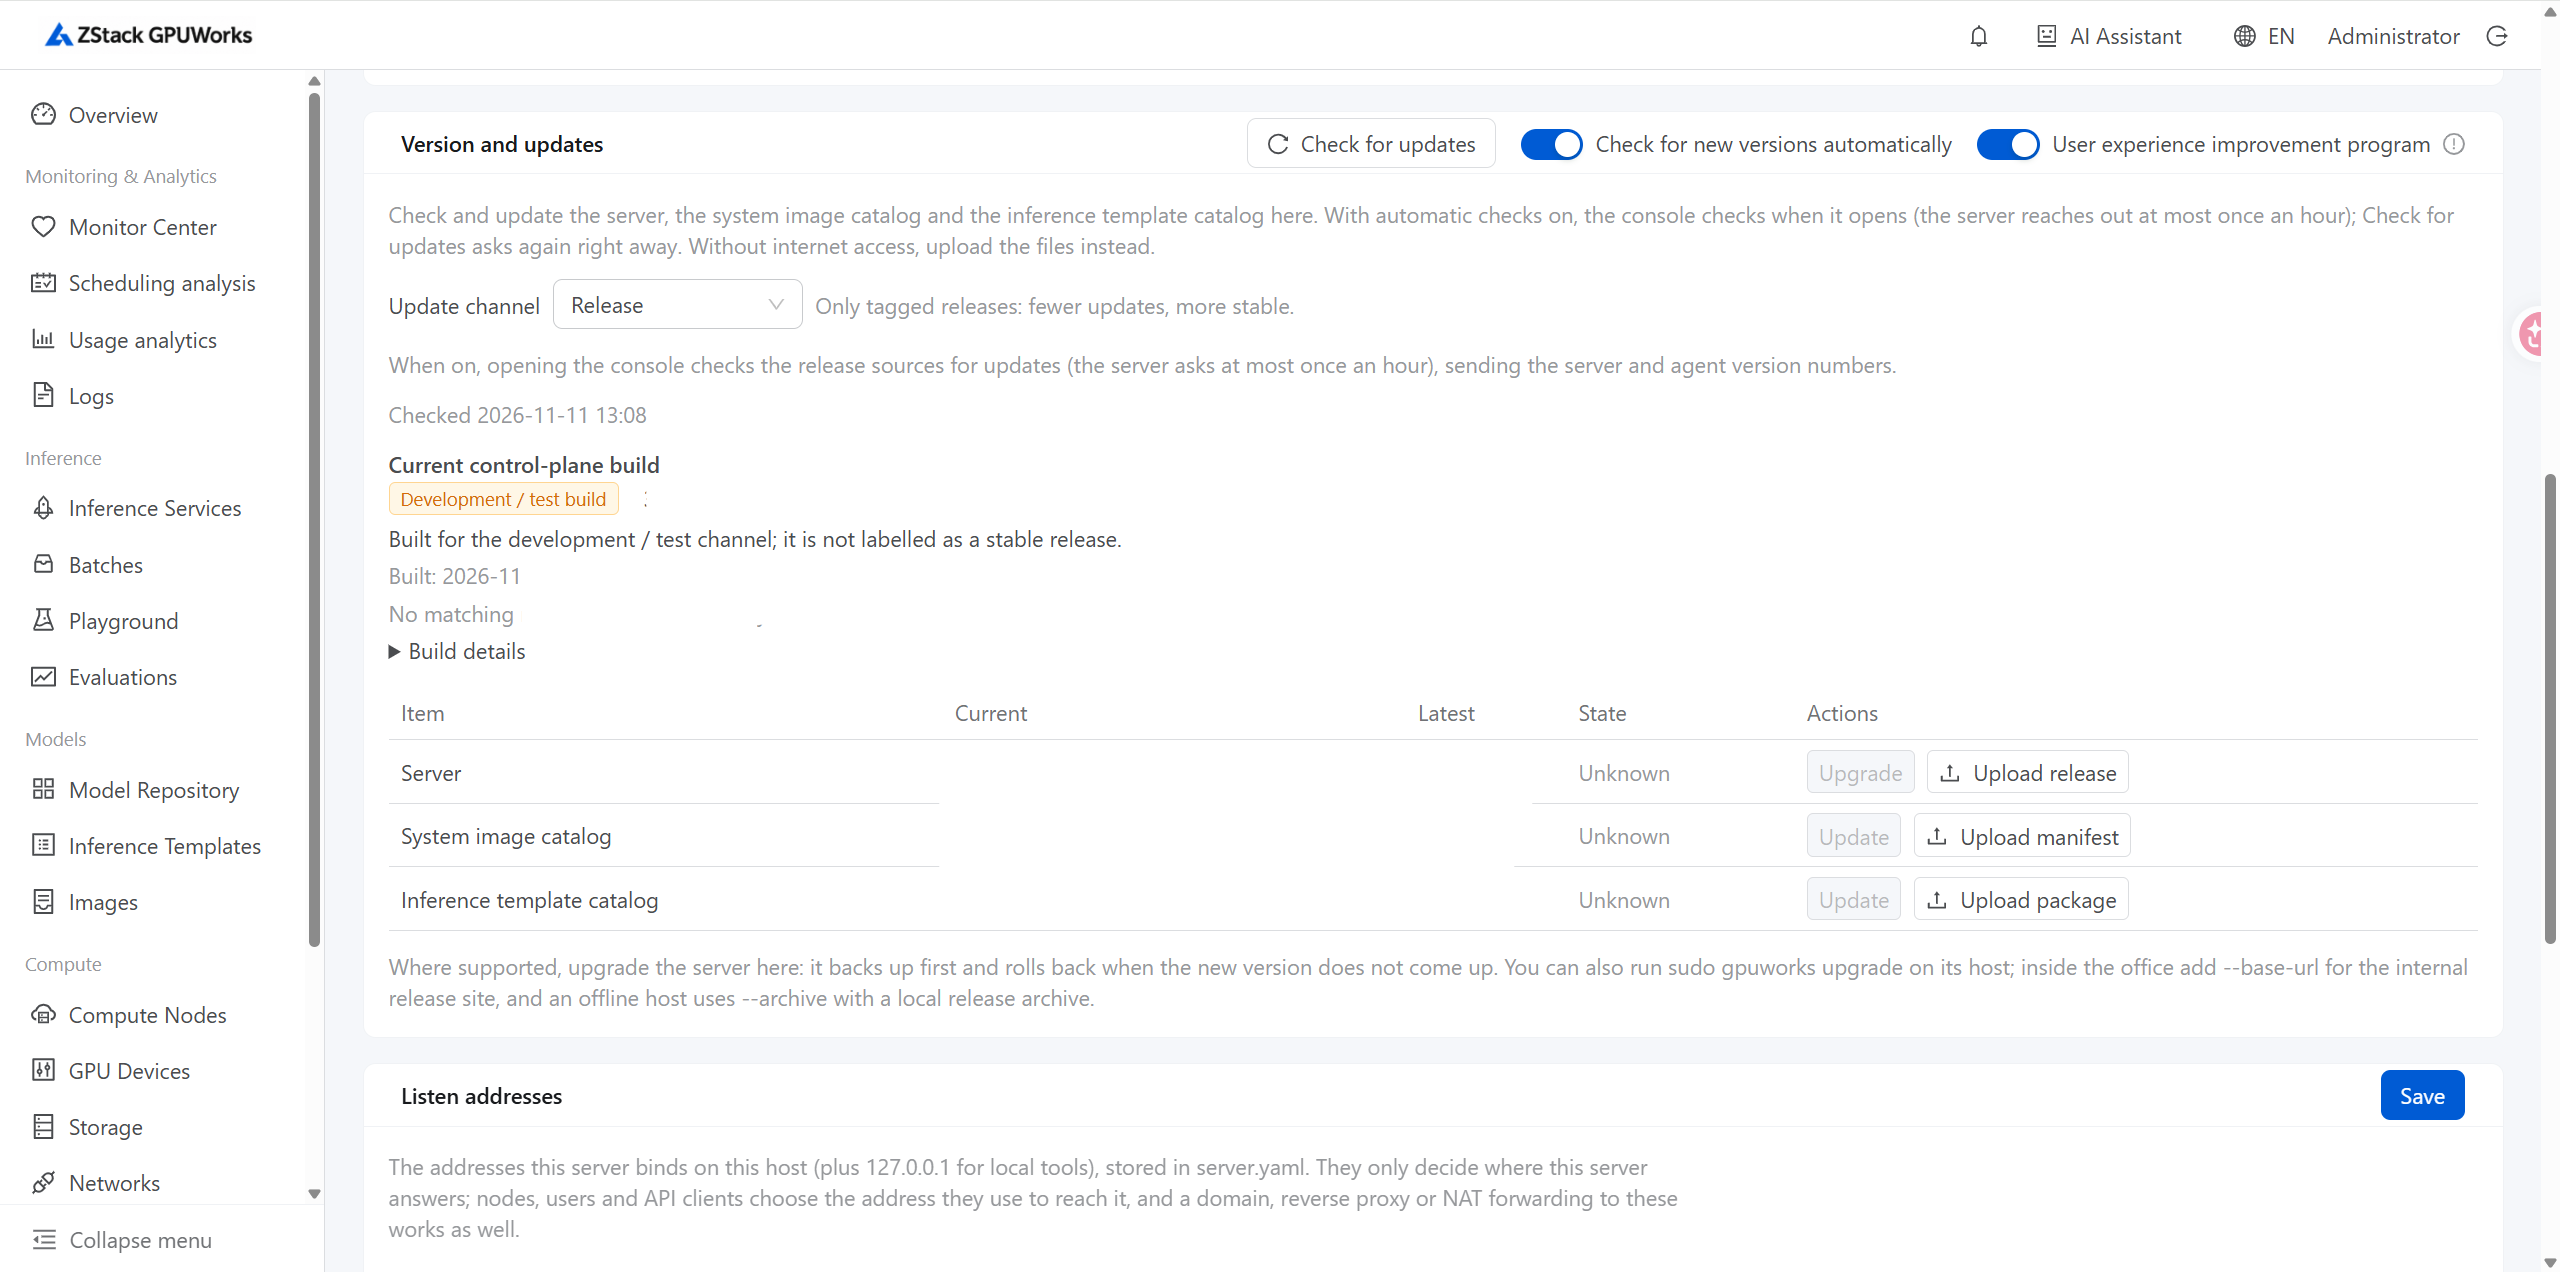
The page waits up to 5 minutes. A timeout only means the page didn't receive a response from the new version — it does not mean the upgrade failed or rolled back. Check the actual version and logs via /healthz on the host, and if necessary check install-history.jsonl in the actual data directory.
When the control plane cannot reach the release source, click Upload upgrade package on the same row and select a gpuworks-<release_id>-<os>-<arch>.tar.gz matching the server's OS and architecture. Uploading and upgrading begin immediately after the file is selected — no confirmation dialog appears.
Automatic new-version detection is enabled by default; when checking, it reports the installation size to the publisher. Disable it to switch to manual "Check for updates".
5.2 Command-Line Upgrade
Run this in the actual installation directory on the control-plane host. For a systemd installation, first obtain the gpuworks group permission; if there are multiple installations on the same host, enter the directory of the one you want to upgrade.
After upgrading, revisit the console or call /healthz to confirm the running version matches the target. When the command exits with a non-zero code, handle it according to the prompt; if the liveness check fails, the previous version is restored automatically, and the backup path is shown in the output. When already on the latest version, it exits with code 0 and does not upgrade again.
When using an internal release site or self-hosted mirror, replace the default source with --base-url or --source. First verify with --check, then run without it:
When the version in the channel is older than the current version, downgrades are disallowed by default; use --force only after confirming you need to downgrade or replace a local build.
5.3 Offline Upgrade
On a machine with internet access, download the release package matching the target host's OS and architecture, along with the SHA256SUMS of the same version, and copy both to the control-plane host. After verification passes, point to the package path with --archive:
No extraction is needed, and the process does not access the release source. If the package is corrupted, the architecture doesn't match, or it is a local build, an error is reported before the service stops. Do not use ./gpuworks install from the new package as a substitute for an upgrade — that has no backup or rollback.
06 / Troubleshooting
Q1: Can't access the service after install or upgrade
Check <install-dir>/logs/gpuworks-server.log, retry after fixing, and re-verify /healthz.
Q2: "cannot listen on :8800"
The port is occupied. First confirm whether it's an old service with systemctl status gpuworks; don't simply reinstall.
Q3: "create /opt/gpuworks/server needs root"
Use an account with sudo privileges, or switch to --dir ~/gpuworks/server --no-systemd.
Q4: Password change or upgrade reports a permission error
The terminal may not have obtained the gpuworks group permission yet; run newgrp gpuworks or re-login.
Q5: Console upgrade times out or fails
Check the service logs and install-history.jsonl, then re-verify /healthz; don't judge rollback solely by the page timeout.
Q6: Release index signature verification failed
Check the server's outbound proxy, gateway, or login interception; temporarily use a matching local upgrade package.
Q7: "Channel has no version yet"
Switch to a channel that has a release, or wait for that channel to publish and check again.
Q8: Can't connect to the release source
Check the server's outbound connectivity and proxy; switch to uploading an upgrade package or offline upgrade.